How to install a new Standard Map
Overview: Typically, a Standard Map image is prepared by the client. During the evaluation process, the client is advised and referred to this help article which, describes the considerations as they prepare their maps. The primary considerations are that the image should be in either a .jpg file format or a .png file format. It should also be legible when printed on an 8.5 x 11 sheet of paper.
https://support.pontem.com/hc/en-us/articles/202398264
Installing a Standard Map Image
- Place the map image(s) in the default maps folder or the equivalent location on the network server.
- The default map folder location on a stand-alone install is C:\ProgramData\pontem\firebird\cem\maps
- There is no limit to the number of maps that can be associated. It is typical for larger cemeteries to have a map for every section in the cemetery.
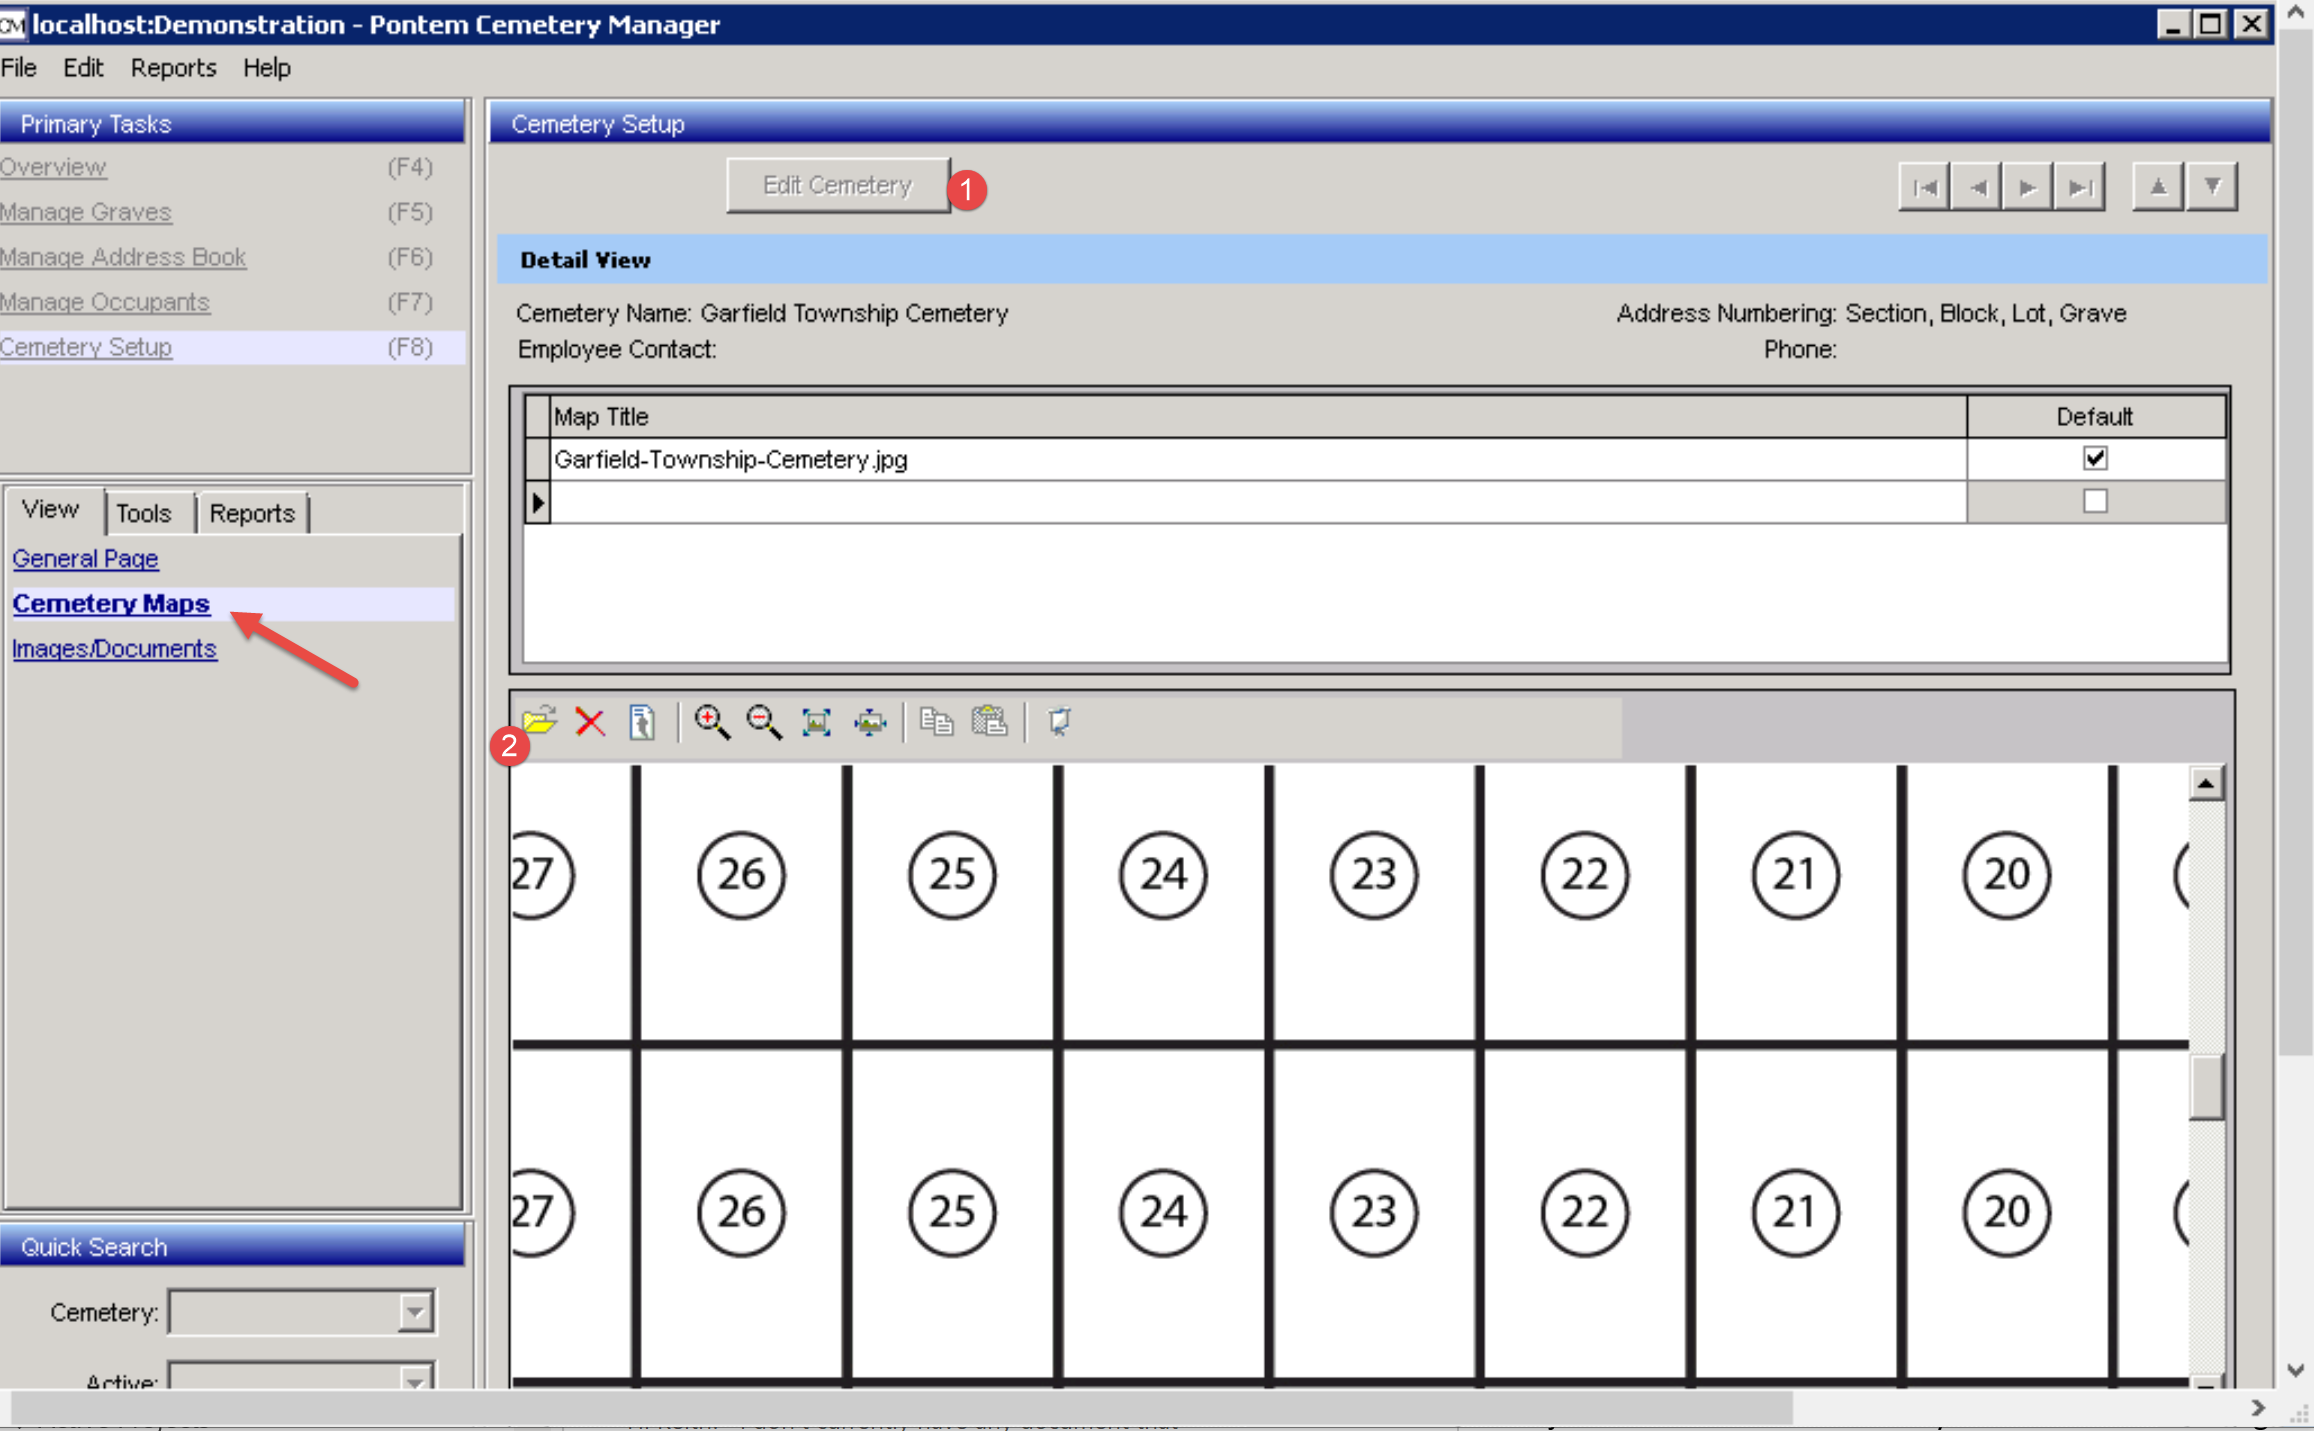
- To associate a map with a cemetery record, navigate to the cemetery setup, select the cemetery, and then click Cemetery Maps. Next, click Edit and then use the browse tool to select the proper map image.
- Note a default map can be specified. Typically this is the map for the area where the most new properties are being entered.
How to assign a property to a Standard Map
Overview: Pontem’s Standard Mapping allows an end user to “assign” the location of a property by marking it on a map image. This, in turn, allows a user who has selected a grave record to “locate” the property on the map at a later date.
Standard mapping does NOT place data, such as the names of owners or occupants on the map. This functionality requires the use of GIS mapping.
To assign a grave record to a map
- In the Manage Grave workspace, navigate to the Details for the grave you wish to assign.
- Next, click Edit and then click the Assign button.
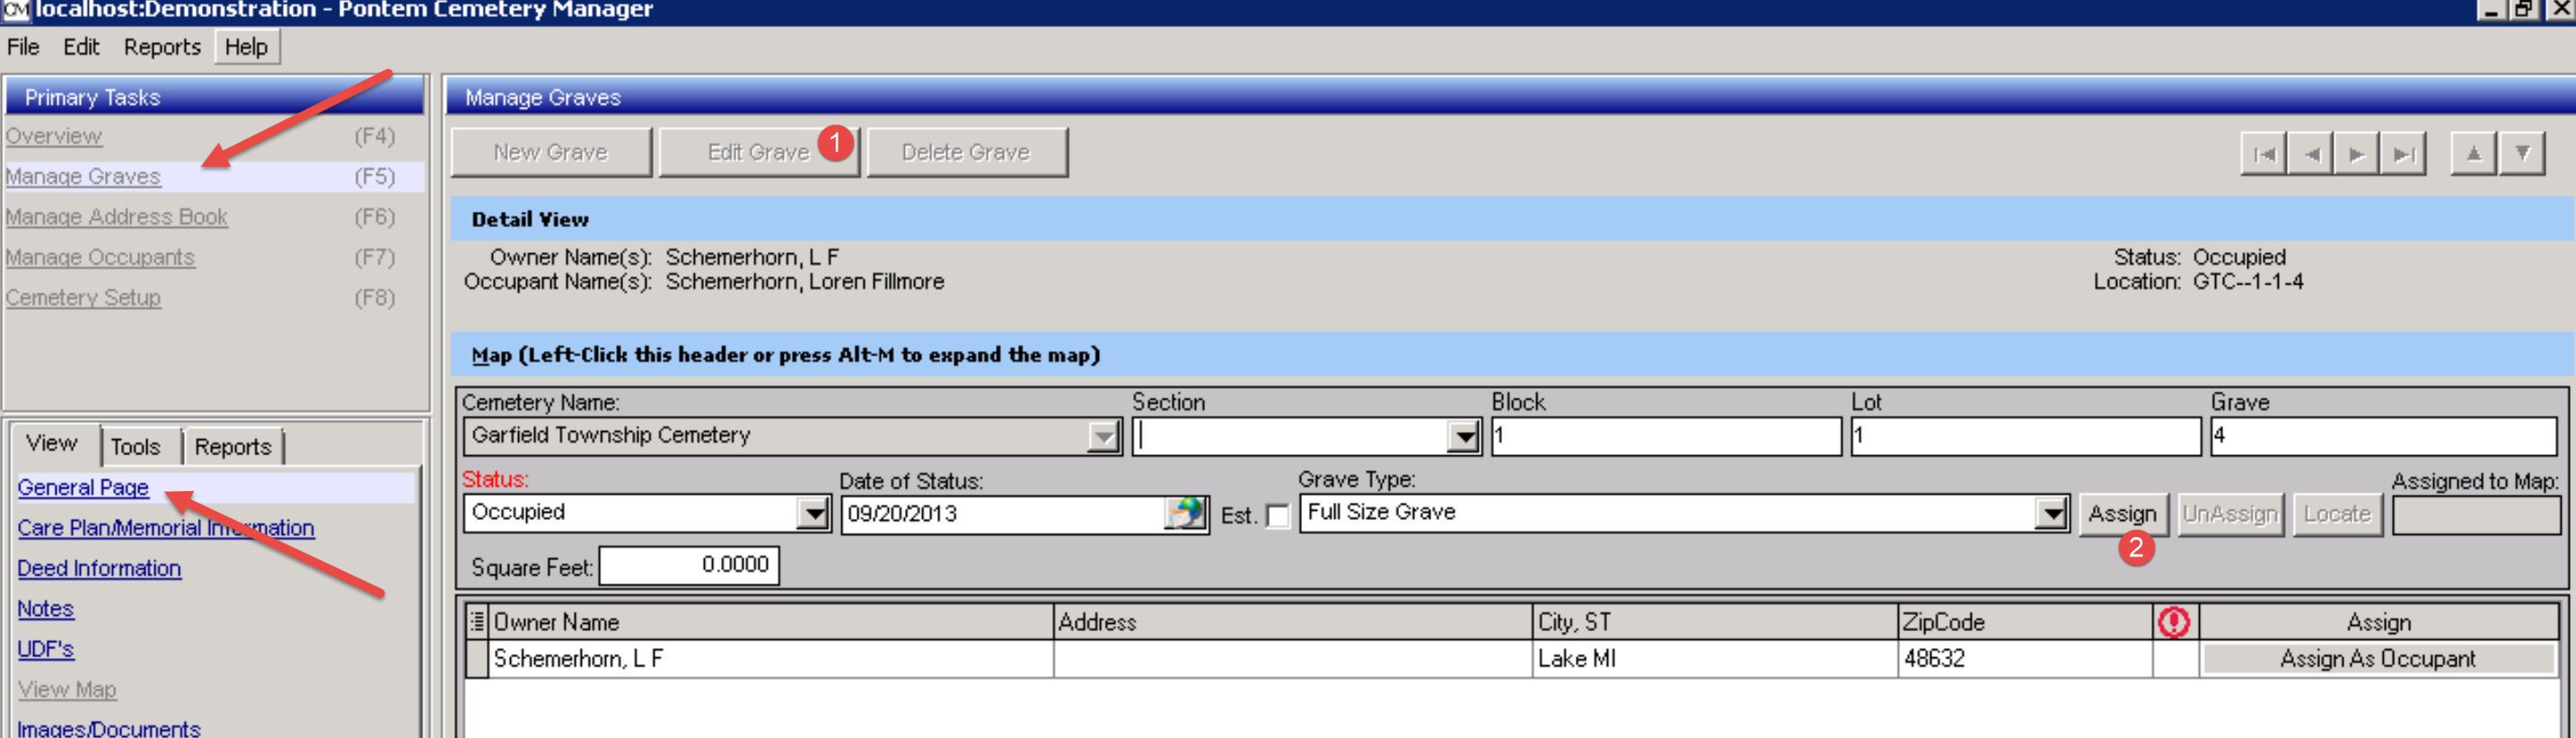
- In the map window that is displayed, select the map to which you want to assign the property. The window will display the default map if no other map is selected.
- If necessary, use the scroll bars and the zoom function to locate the grave location on the map. Notice your mouse has become a set of crosshairs. Position the center of the crosshairs on the approximate location of the grave and click your left mouse button.
- Click Save
You should now be able to return to the General page for this grave and click the Locate button to test the assignment is as you desire. If you are not satisfied with the placement of the map assignment, you can repeat the above steps to place a different map assignment.
CAUTION: The standard mapping function records in the database which specific pixel in the map image has been selected. Please use EXTREME CAUTION if modifications are needed for a map image with location assignments. ANY changes to the image’s aspect ratio or the location of the properties within the image will skew existing map assignments.
How to show the results of an Advanced Search on a Standard Map
Overview: The results of an advanced search can also be displayed on a Standard Map. The end user can perform multiple searches, adding the results of a subsequent search to a map using a different color.
The following example shows how to perform an advanced search, where the objective is to show a map with a color-coded status of all properties. Of course, this assumed all the properties are assigned to the map. Any grave filter criteria that would normally be displayed as a list on your screen can be displayed on the map.
To display search results on a Standard Map
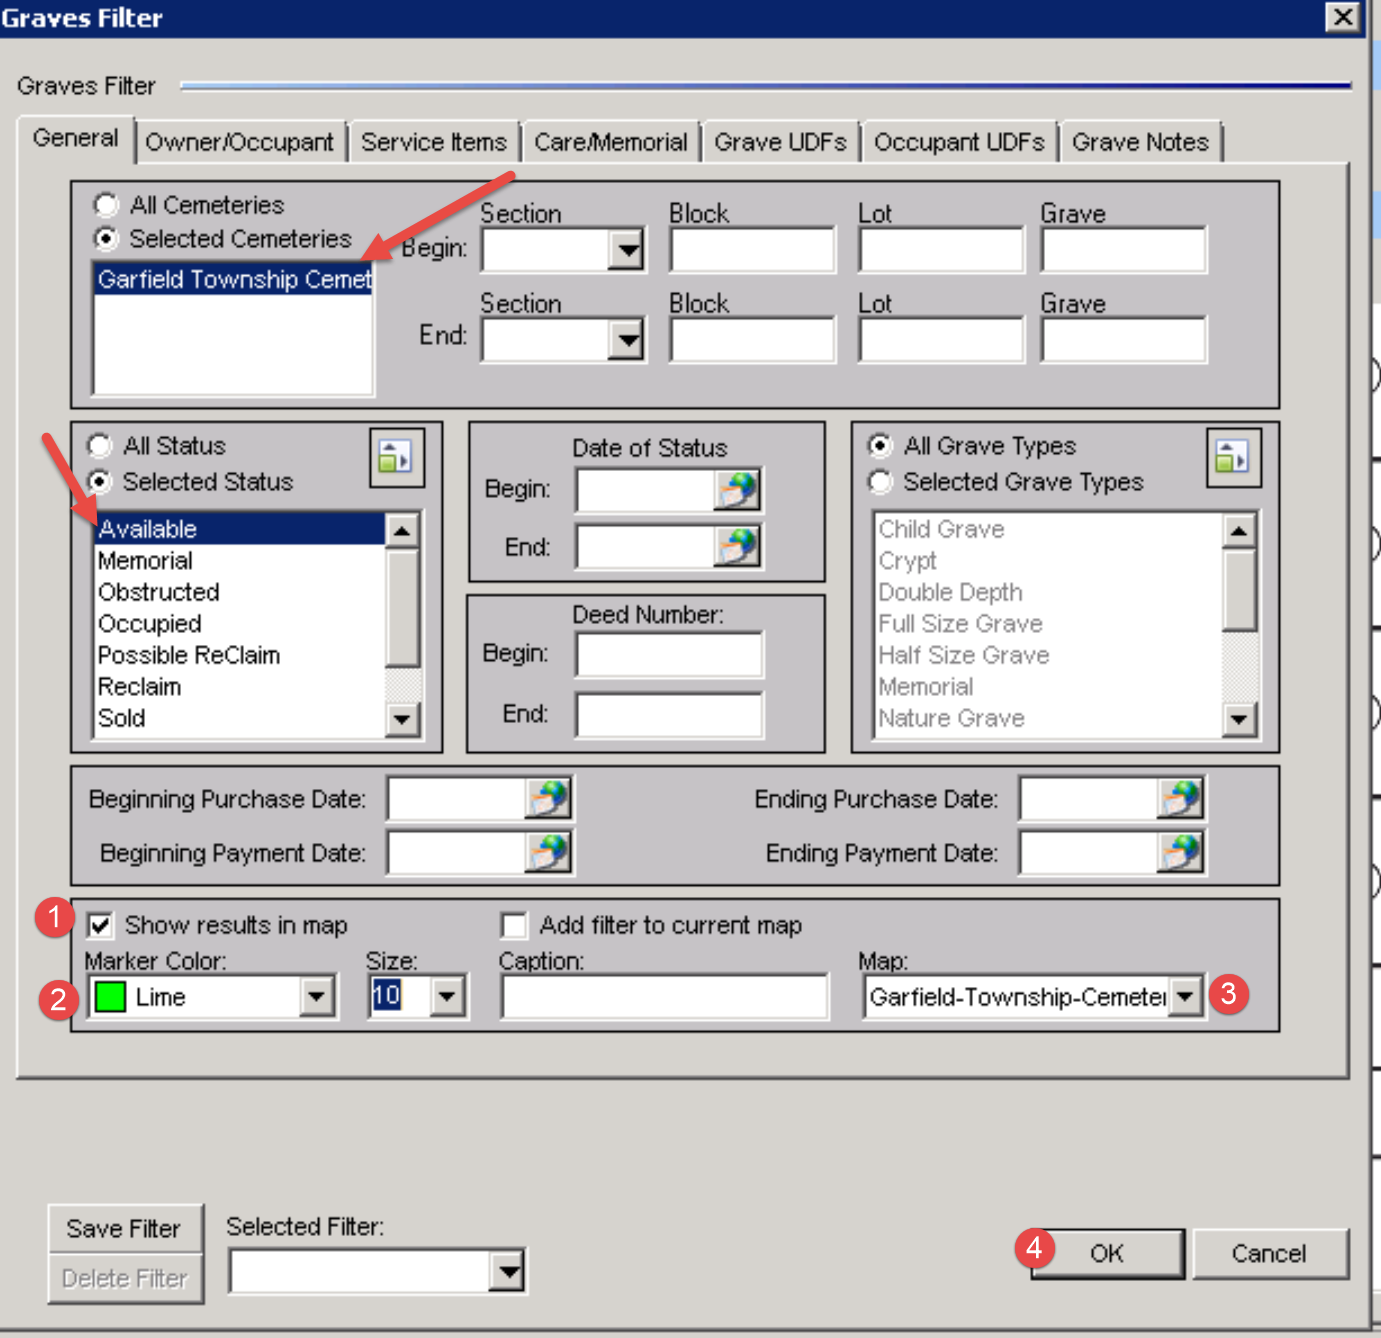
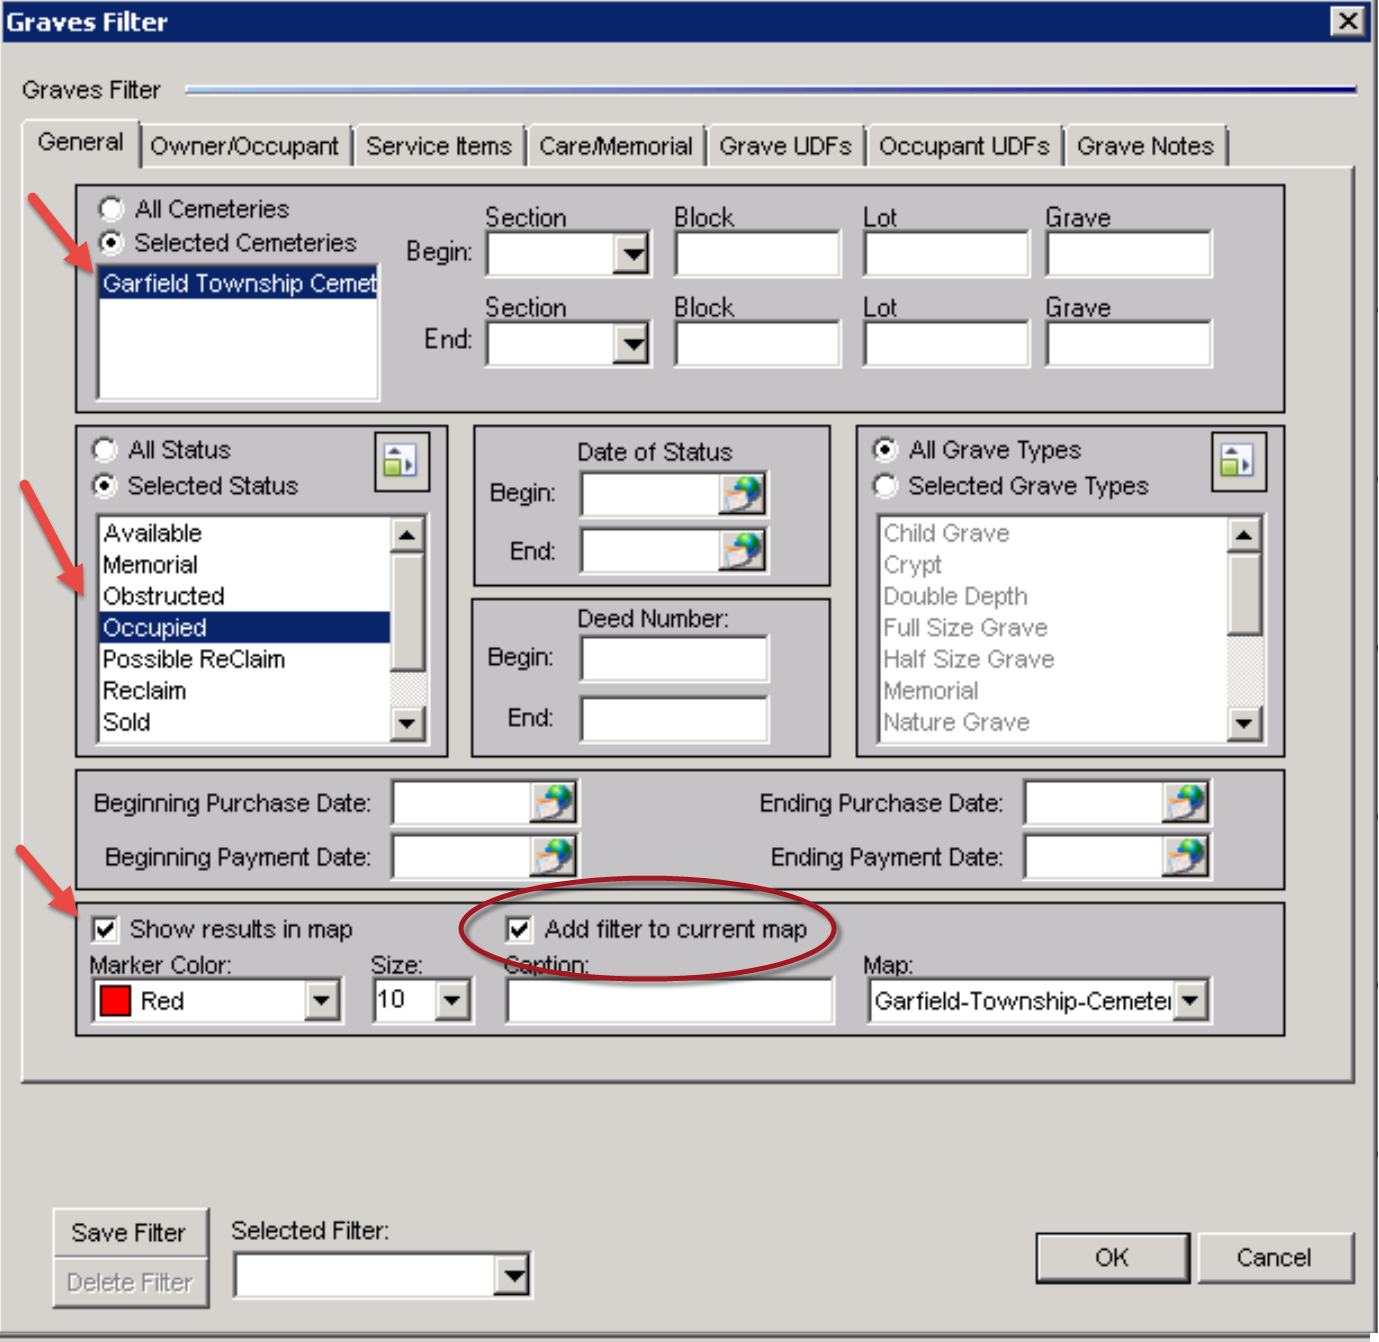
- From the Manage Graves workspace, click the Advanced Search button.
- On the resulting filter screen, enter your filter criteria. In this example, we are searching for Available properties in the Garfield Township Cemetery.
- If you have multiple cemeteries, you must select a single cemetery when displaying results on the map.
- Before clicking OK to run the search, tell the filter to show the results on the map.
- You can change the color and size of the markers placed on matching grave locations.
- If you have multiple maps for a single cemetery, you must choose which map to use.
- Click OK
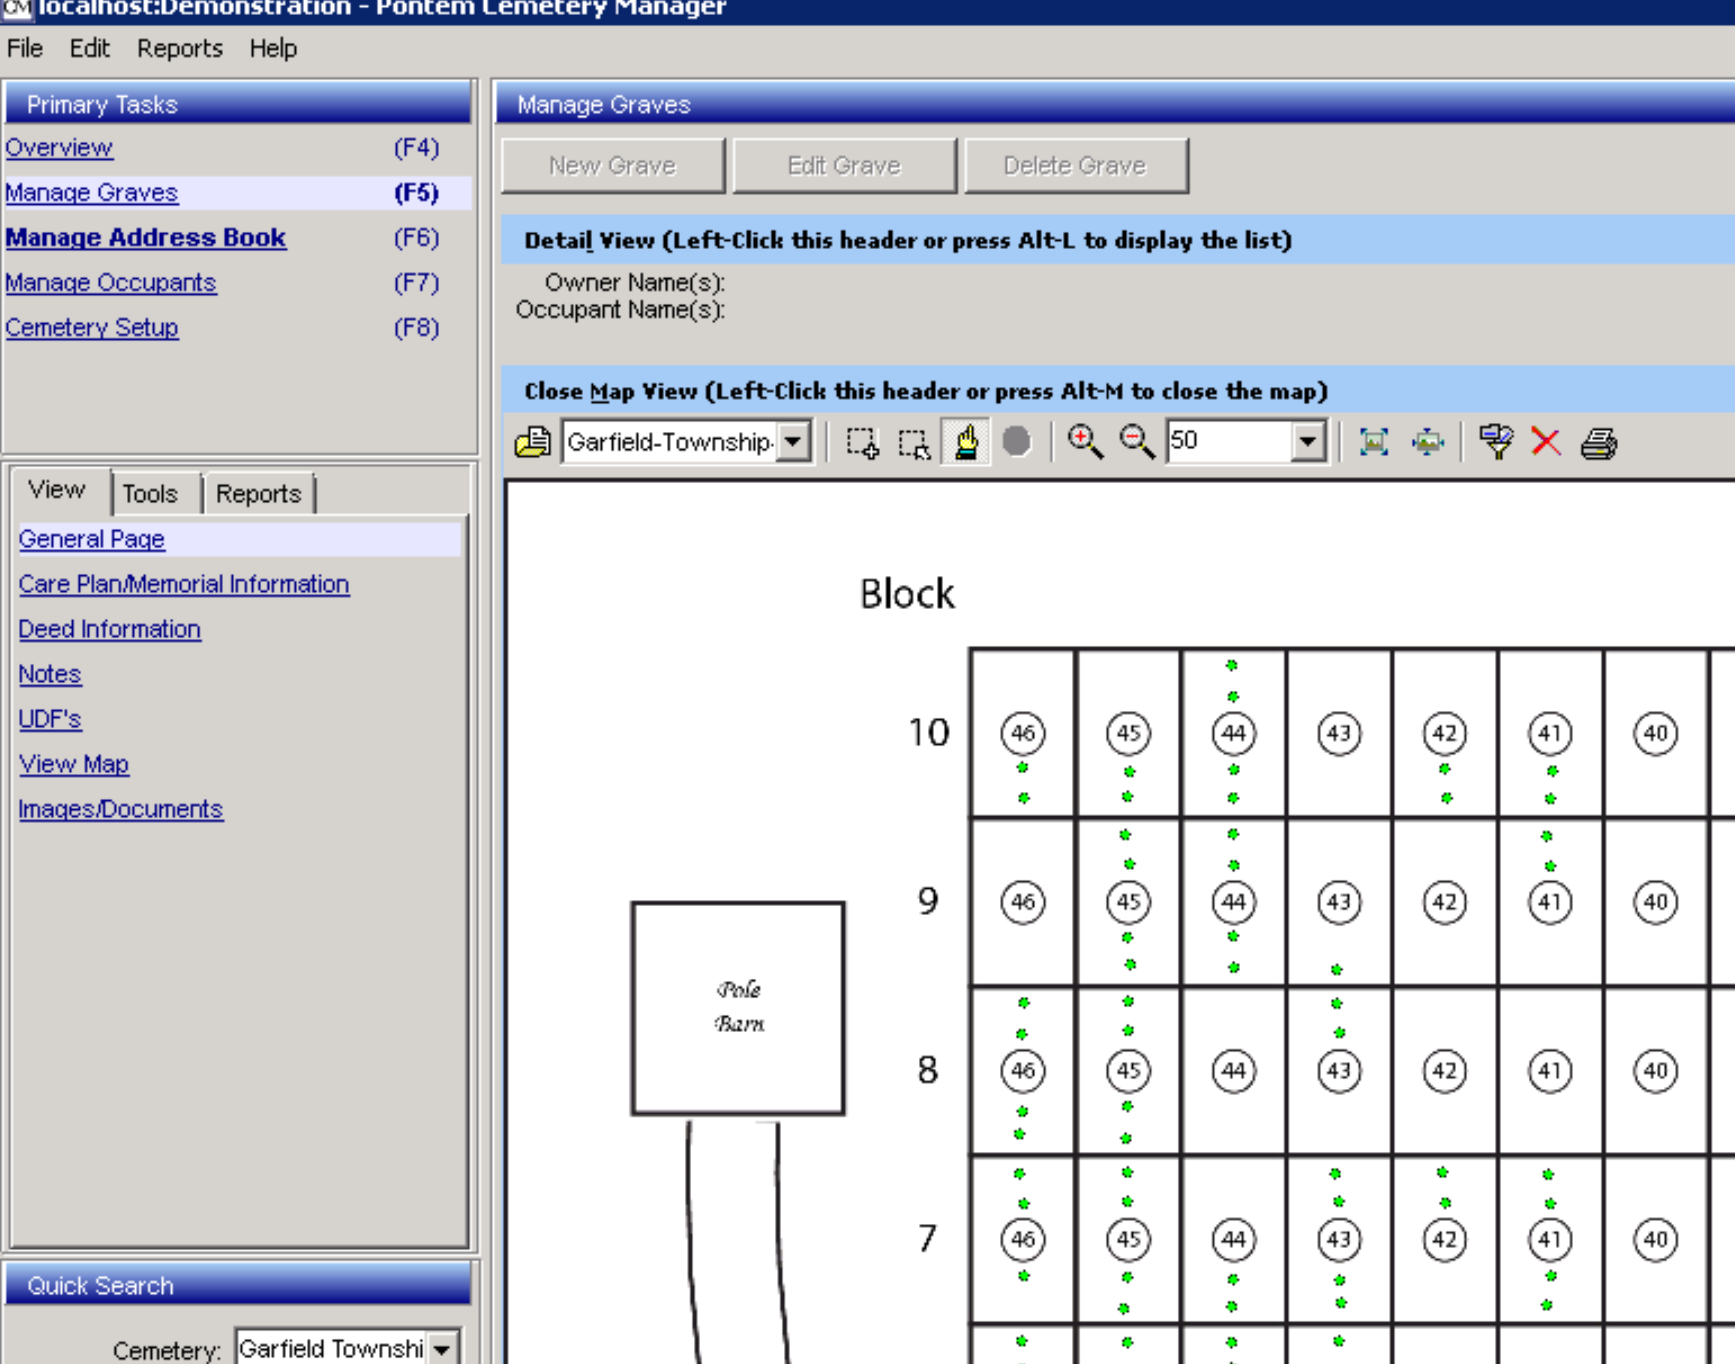
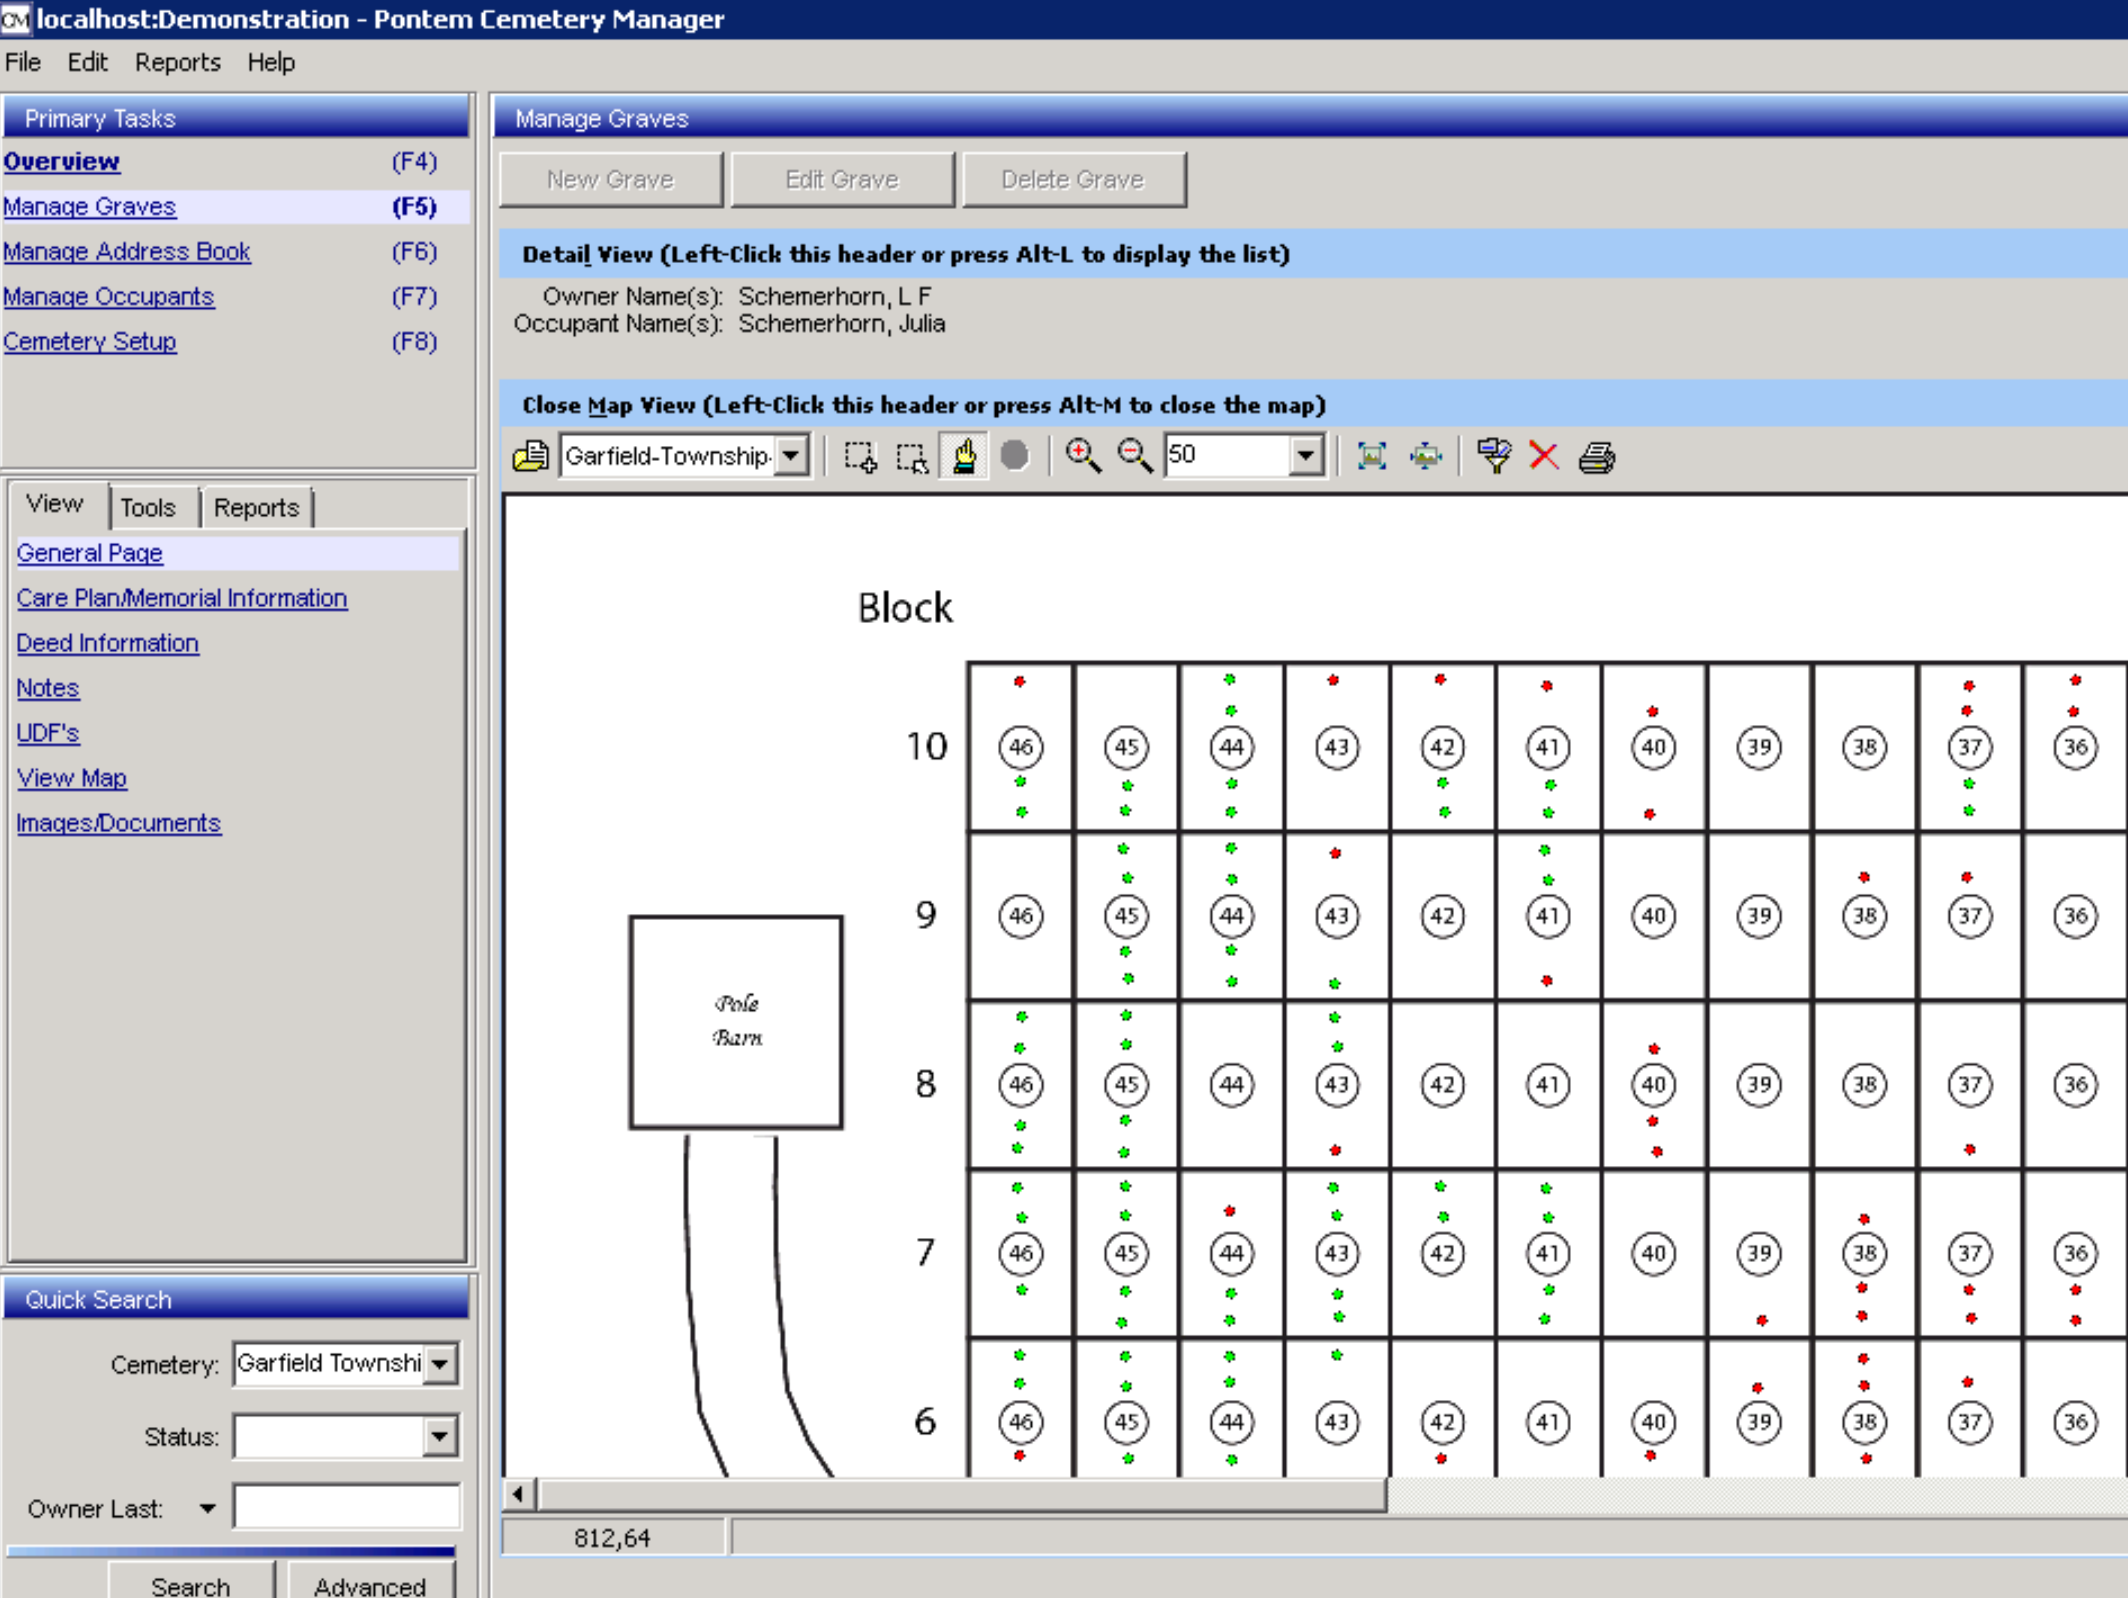
- The results will then be displayed on your map.
- To add additional searches to this same map, perform the filtering steps once again using your additional filter criteria. In this case, a filter for the Occupied graves is being applied.
- Be sure to choose a different marker color than previously used to differentiate the results of this filter as compared to the previous.
- Click the checkbox to indicate you want the results of this filter displayed on the current map.
- The Map now displays the results of both searches.
- Repeat as needed.
Did you know? Hovering your mouse over a map marker gives a glimpse of the details. Clicking on a map marker will take you to the matching Grave record.

0 Comments